Tuesday, April 19, 2011

"Loft" for Storage

On our first camping trip, we found ourselves opening out the loft "bed" to use for storage of shoes, the memory foam mattress we sleep on, laptop backpacks, etc...

Since we'll never use it as a bed, we decided to make the best of it as a storage shelf.  We'll continue to use it for all the items mentioned above, and it will also be a perfect place for the portable a/c when the time comes to use it.  There is plenty of clearance space, and the small window will be ideal for the exhaust.

To pretty it up a little, we put down some indoor/outdoor carpet (same as what we used to cover the wheel wells).

Tuesday, April 12, 2011

Our Maiden Voyage

Our first trip in the Aloha took us a mere 100 miles away to Topaz Lake just outside of Gardnerville, Nevada, and near the California border.  We didn't want to go too far away just in case any issues popped up.

I'm happy to report that all went well.  Mostly.

Our intended departure time was around 10:30 a.m., and about four and a half hours later we were on the road. For some reason, the exterior trailer lights didn't work.  Long story short...  We ended up putting some temporary lights on the bumper so we could get on the road.  When we hooked up to leave camp, the trailer lights worked just fine!  Could have been some moisture in there from winter snow...  Whatever.  They're working now!

Pulling the trailer was smooth, and we arrived to the campground safely.  Setting up camp was quite an ordeal, but I'm sure we'll get better at it.  The greatest challenge was setting up the truck tent for Amy's son.  In addition to really crappy instructions, it was pretty darn cold out there!!  But at the end of that struggle, Shaun had a VERY nice and very spacious setup complete with an air mattress, overhead lights, his laptop, and a space heater that kept the tent cozy.

After a Saturday that started at around 6:30 a.m., we passed out from sheer exhaustion somewhere around 10:00 p.m.  The first morning at camp was gorgeous, and we spent a little time getting things situated before heading out on a long walk.

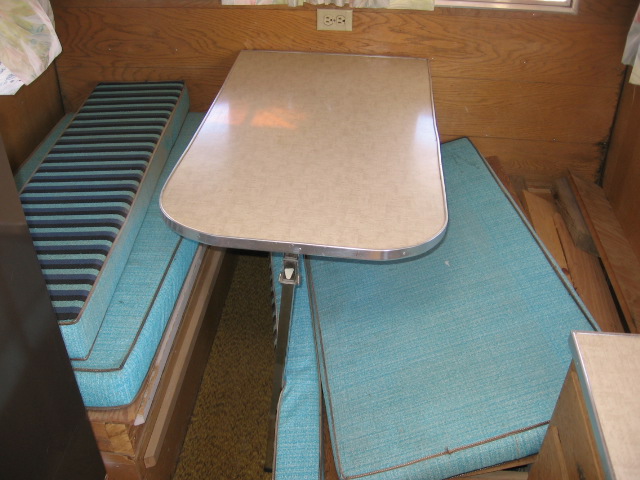
As for the trailer...  We ran into one sink drain issue, but it was a result of "user error" so that got worked out quickly.  The toilet worked perfectly, and we only tripped the breaker once (space heater/convection oven combo).  The ease of accessing clothing and other items wasn't as we would like, but this trip allowed us to figure out how we want things and which modifications need to be made for future trips.

I don't like how the water drips at the outside connection site to the trailer, but I don't know what to do about that.  The washer inside is brand new, and the connection was smooth and tight.  I don't know that I've ever had a water hose that DIDN'T leak???  I assume this is common and will continue to keep a bucket out there (even though I consider it an eyesore).  There were no leaks inside, and that is the most important part!

Enough blah, blah, blah...  Here are some pictures.

Finishing the setup on the first morning

View from the door (to the right)

View from the door (to the left)

Truck and truck tent

Cutest camp lights ever!

Looking under the canopy toward the truck tent

View from the rear of the Aloha; sunrise the first morning

Topaz Lake and surrounding mountains


View from the front of the Aloha

Tuesday, April 5, 2011

Cutest Compact Fridge EVER!

The fridge that was in the trailer when we bought it worked just fine.  We didn't really like that it was brown though.  And we *did* try to paint it.  That didn't go so well.

I'm not completely sure what the original space looked like....maybe just a tall, narrow closet.  But someone had cut out a space for the compact refrigerator and did a pretty decent job with the modification.

And here's the new fridge.  We just love this little thing!  Two doors.  Huge freezer.  And it fits in the space perfectly!

Tuesday, March 29, 2011

Almost Final Exterior Shots

We do intend to repaint the exterior, but it may be something we save for either the fall or next spring.  I don't know.  We *might* get inspired and still do it this spring or summer, but I'd rather leave us that out so we can start enjoying it.

So for now, here's where we are on the outside...

The street side and rear on day 1...

And today!

The curb side and front on day 1...

And today!

Both Decals On! Lovin' it!!

Put the recreated front decal in place this morning.  I just love these things!  They make a HUGE difference on the Aloha.

What was left of the front decal...

The recreated decal

Closeup

Monday, March 28, 2011

Recreated Decal in Place

We had a graphics company recreate the sticker/decal that was in place on the rear and the front of the Aloha.

Here's what we started with (on the rear)...

Closeup of the recreated decal in place...

View from a distance...

Thursday, March 24, 2011

Cushions and Curtains

It's starting to look inhabitable!

We still have to add the appliances and a few wall decorations, but the inside is just about done.

Here's a shot of the dinette/loft area when we first brought her home.

And here it is today.

The view from the door on day one...

And today

Wednesday, March 23, 2011

Removal of Stove/Oven; Renovation

Neither Amy nor I are all that interested in using propane in the trailer.  And while it was difficult to decide against using the very cool, original stove/oven, we're pleased with the changed space.

Here's the original state of that space.


Stripped down.

After our modifications.  We will use a toaster/convection oven in the new space and place a large cutting board over the opening to prepare food and to serve as additional counter space.

Cushion Covers

We hired a seamstress to cover the original dinette cushions and to make curtains for us.  (Yes, we cleaned the cushions *thoroughly*.)

Original cushions...

Newly covered cushions and a peek at the curtains...

Monday, March 21, 2011

Bumper B and A

Cleaned up the ol' rusty bumper, removed the Auto Zone taillights, and added reflectors...


Saturday, March 19, 2011

Original Flooring

The original flooring was in really great shape, so we decided to keep it in place.  After some old-fashioned scrubbing and a couple coats of Armstrong Shine Keeper, we were pleasantly surprised.

Before...

After...

Original License Plate

The lady from whom we purchased the Aloha bought it from the original owner.  As a result, she received the original license plate from Washington state.  She was kind enough to pass it on to us.  I cleaned it up and re-painted it and will display it inside once we're done with the dirty work.

Recreated Decal

Aloha travel trailers haven't been manufactured in many decades, so getting our hands on replacement decals is impossible.  After checking around with a number of companies, I lucked into a group in upstate New York who helped me out.

I don't have the new decals on the trailer yet, but I will update when I do.  For now, I can show you what is left on the trailer and the packaged recreation.

Existing front decal...

Existing rear decal...

Recreated decal...  I'll post an update once I actually get these in place.

Friday, March 18, 2011

Polishing Aluminum

The mid-section of the skin had been painted....who-knows-how-long-ago....and was speckled, chipped, and oxidized.

For this section, we followed these steps:

1. First pass with 0000 steel wool soaked in WD-40.
2. Two passes with Nuvite Nu-Shine II grade G6 (very coarse; breaks down oxidation)
3. One pass with Nuvite Nu-Shine grade S (very fine)

This close-up of a front piece shows the aluminum polished (only one pass at this point) and also shows the speckled condition that we started with.

Here's the curb-side on Day 1.

Curb-side after a little elbow grease.

Street-side on Day 1.

Street-side after polishing.

A Toilet is Born!

First things first, right???

Well, it wasn't exactly first; but installing a toilet in that convenient closet space was at the top of our list.  We have had only good experiences showering at campgrounds (hope that streak continues), but it sure is nice to have a toilet in your trailer.

So here's how that progression looked...

Here's the space on day 1.

Cleaned out and ready for a new sub-floor.

New sub-floor and flange.

And there she is! FRP panel on the floor, and pex plumbing for the water supply.  We also covered the wheel well.  Not sure what to do about the exposed electrical yet, but it's safe for now.

Closet dowel above...and...

...another closet dowel across from the toilet.  We also added a medicine cabinet, an overhead light, and a couple of small shelves.  And the toilet paper dispenser, of course!  The cord for the light has since been covered and looks a little neater.